
Here's the thing: this small titanium or zirconia piece plays an outsized role in how your final tooth looks and feels. It shapes the gum tissue around your implant, setting the stage for a crown that emerges naturally instead of looking bulky or artificial.
This guide breaks down what a healing abutment does, how long it stays in place, what to expect day-to-day, and how a board-certified periodontist manages this phase with precision. At Dental Implants in Mexico, Dr. José Moguel brings 38+ years of experience and over 17,000 implants placed to this exact step of treatment.
Key Takeaways
- A healing abutment temporarily shapes gum tissue around your implant during recovery
- Typical wear time is 2 to 6 weeks, depending on your healing response
- Proper placement directly affects both the appearance and long-term stability of your final crown
- Distinct from a cover screw (submerged) and a permanent abutment (the lasting connector)
What Is a Healing Abutment for Dental Implants?
A healing abutment, also called a healing cap or gingival former, is a temporary component screwed onto your implant fixture once it's exposed. Think of it as a placeholder that trains your gum tissue how to grow around your future tooth.
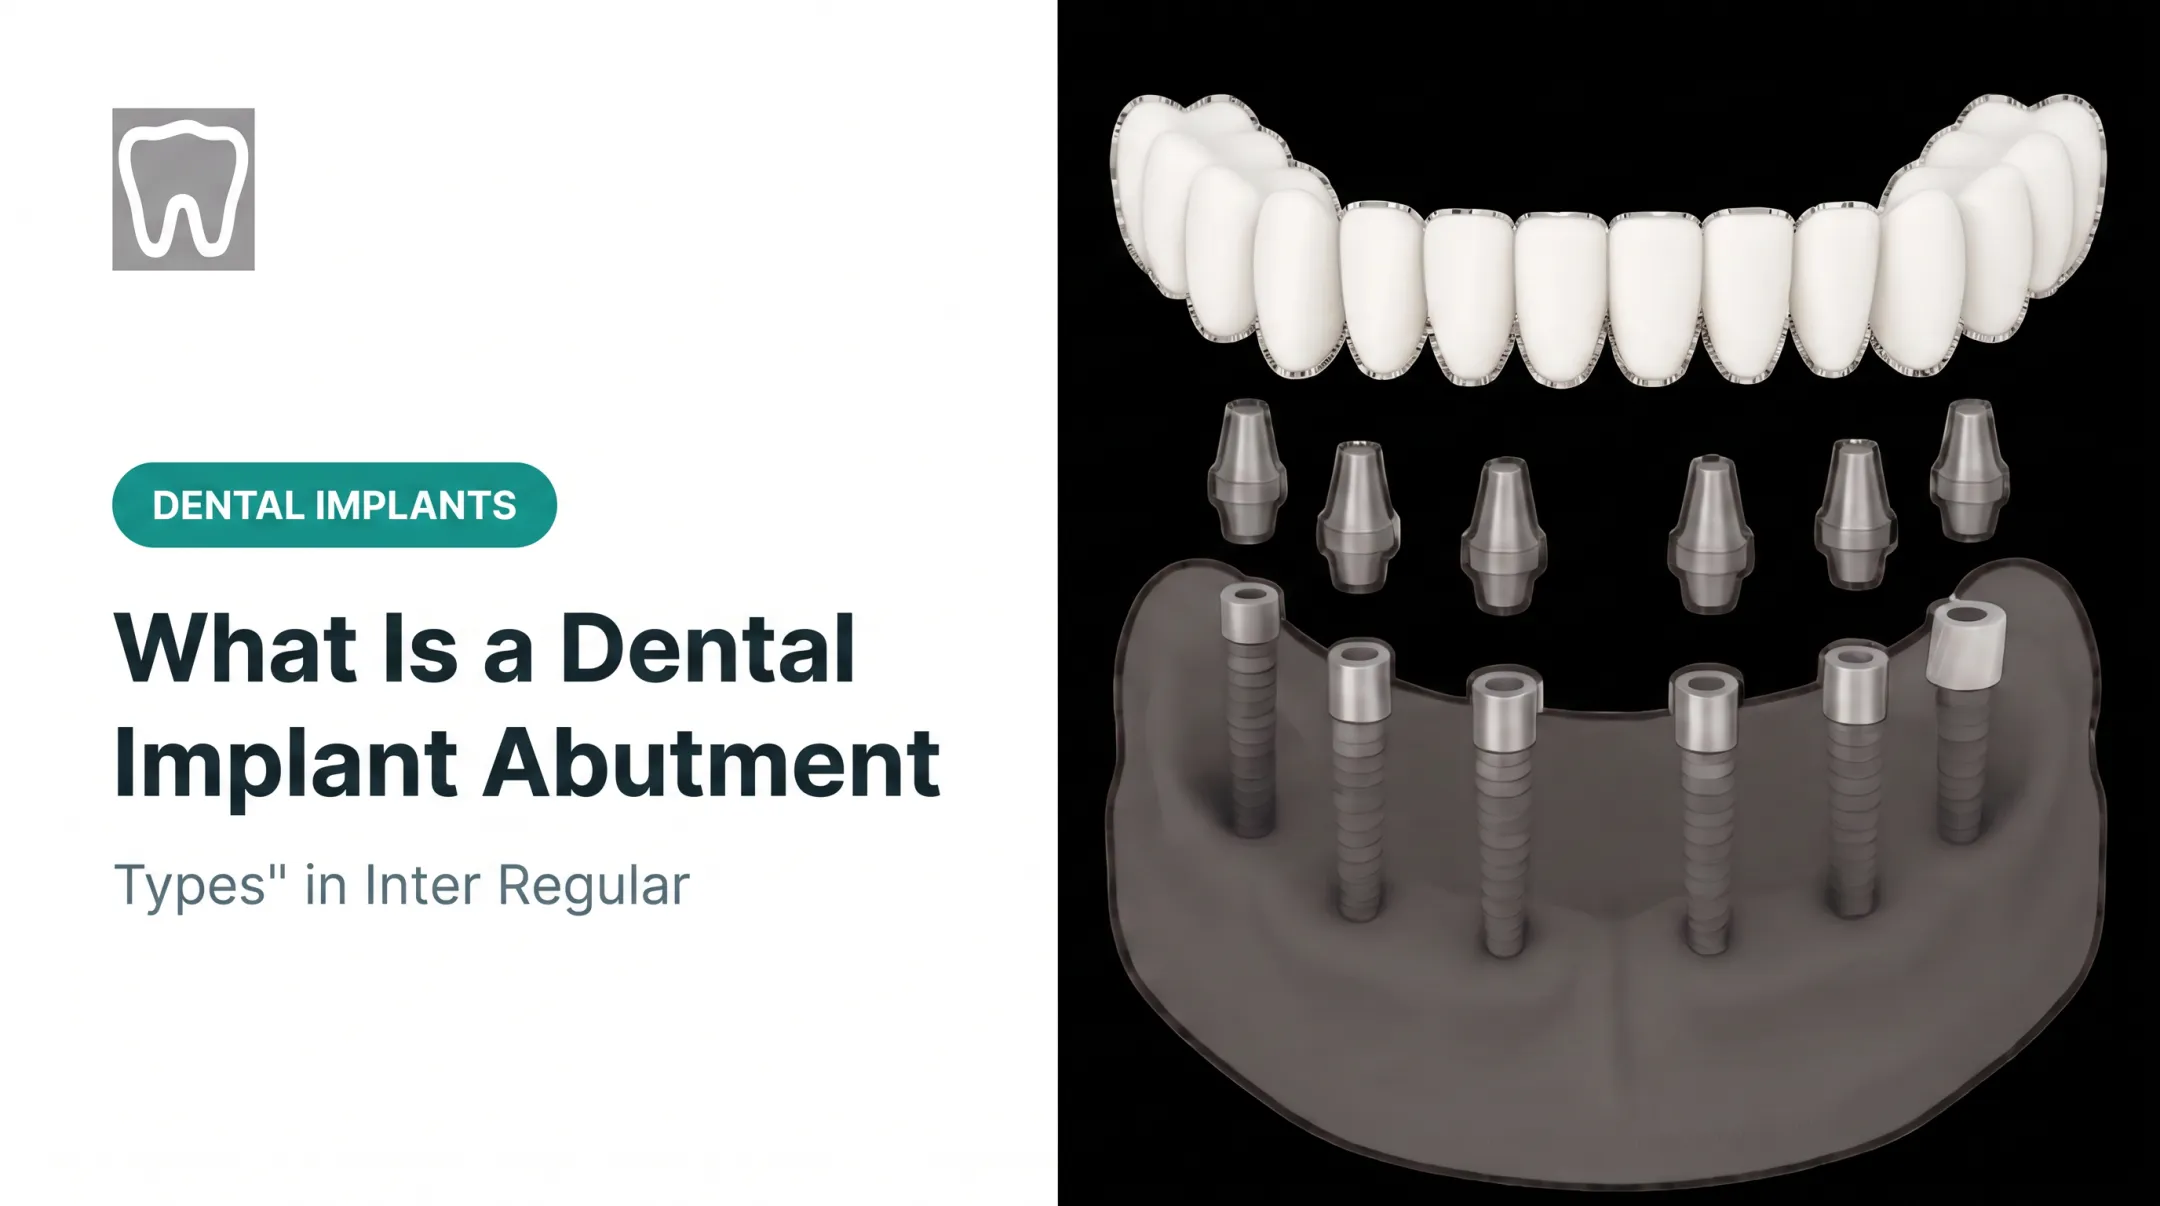
To understand where it fits, picture the full implant structure:
- Implant fixture - the titanium post anchored into your jawbone
- Healing abutment - the temporary piece that shapes gum tissue
- Permanent abutment - the lasting connector placed after healing
- Crown - your final, visible tooth

Unlike a cover screw, which sits flush beneath the gumline during initial healing, a healing abutment protrudes slightly above it. This exposure is intentional. It gives the gum tissue something to heal around, forming a natural collar shape instead of flat scar tissue.
Material choice varies by case. A 2022 narrative review on healing abutments describes several options used for customized healing abutments:
- Titanium for strength and biocompatibility
- Zirconia when a more natural blend with gum tissue matters in visible front-tooth areas
- PEEK and other materials for specific customized needs
The right option depends on where the implant sits and your clinical situation.
How Healing Abutments Work: The Healing Process
Placement Procedure
If your implant was placed using a two-stage approach, it's currently sealed beneath a cover screw. Getting to the healing abutment stage involves a short procedure:
- Your dentist exposes the implant with a small incision if it is still submerged
- The healing abutment is screwed directly onto the implant fixture
- Gum tissue is sutured snugly around the abutment to shape the cuff
This is done under local anesthesia and typically takes well under an hour.
Role in Osseointegration and Soft Tissue Shaping
By the time you reach this stage, osseointegration (where bone fuses to the implant) is largely finished. That process alone takes 3 to 5 months, according to a 2023 review on osseointegration.
The healing abutment's job is different: it protects the implant site from bacteria and food debris while guiding soft tissue into a natural cuff shape. That cuff forms a biological seal, where junctional epithelium and connective tissue attach to the abutment surface.
This attachment is distinct from how gum tissue clings to a natural tooth root, and it is more vulnerable to bacterial invasion if hygiene slips.

Healing Timeline
Most patients see gum tissue stabilize within 2 to 6 weeks. That range depends on:
- Individual healing response
- Implant location (front teeth vs. molars)
- Whether you had a one-stage or two-stage procedure
This 2–6 week window follows several months of osseointegration that happened earlier—don't confuse the two clocks. Your implant may already be fused to bone, but the gum tissue collar still needs its own healing time before a final crown fits properly.
Healing Abutment vs. Cover Screw vs. Permanent Abutment
These three components often get mixed up, but each serves a distinct purpose:
| Component | Position | Function |
|---|---|---|
| Cover screw | Submerged below gum | Seals implant during initial bone healing; no tissue shaping |
| Healing abutment | Protrudes above gum | Actively shapes gum contour during soft-tissue healing |
| Permanent abutment | Fixed connector | Supports the final crown after tissue has matured |
A cover screw is used in two-stage procedures, where the implant is left fully submerged while bone integrates. Once that phase completes, a small procedure exposes the implant and the healing abutment goes on.
In one-stage procedures, the healing abutment is placed immediately at implant surgery, skipping the cover screw phase entirely. A 2017 comparative study involving 310 implants found no significant difference in marginal bone loss between one-stage and two-stage approaches, though one-stage treatment can mean less overall treatment time.
The choice between these approaches depends on bone quality, grafting needs, and case complexity. Your treating clinician makes that call based on your specific anatomy.
Key distinction: "healing abutment" and "implant abutment" aren't interchangeable. The healing abutment is always temporary. The permanent abutment is the lasting structure that anchors your crown for years to come.

Living with a Healing Abutment: Diet, Care, and Sensations
Soft foods protect the implant site while gums heal. Avoid direct biting pressure on the abutment—especially from hard, crunchy, or chewy foods. As gums adapt over the following weeks, you can gradually reintroduce normal foods.
The American College of Prosthodontists recommends brushing at least twice daily and using interdental cleaners around implant restorations. Around a healing abutment specifically:
- Brush gently with a soft-bristled brush
- Use antimicrobial rinses if your dentist prescribes them
- Avoid aggressive flossing directly around the abutment site
- Watch for redness, swelling, or bleeding that doesn't improve
Mild tenderness and a slight prominence where the abutment meets your gum are normal. Some swelling in the first few days is common and usually settles within about a week.

Potential Complications and When to See Your Dentist
Most healing phases go smoothly, but certain signs warrant a call to your dental team:
- Persistent pain that doesn't ease with over-the-counter relief
- Swelling that continues beyond a week rather than improving
- Discharge or an unpleasant taste near the implant site
- A loose or shifting healing abutment
A loose abutment isn't just uncomfortable. It can undo the tissue shaping that's already occurred and raise infection risk. If you notice any movement, contact your provider promptly rather than waiting for your next scheduled visit.
Careful abutment placement and tissue management help keep these problems from starting. Dr. José Moguel has placed more than 17,000 implants across 38+ years of practice, with a clinical success rate above 98%. That depth of implant work is what this healing phase depends on.
What Happens After the Healing Abutment Stage
Once your gum tissue has matured into its natural contour, your dentist removes the healing abutment and places the permanent abutment and final crown.
Modern clinics use digital scanning and CAD/CAM technology to design a crown that matches your healed gum shape with precision. At Dental Implants in Mexico, a digital scan once the abutment is attached drives custom crown fabrication shade-matched to your surrounding teeth.
For patients traveling from the US or Canada, treatment typically follows two visits:
- Initial visit for implant placement
- Return visit roughly 3 to 6 months later for permanent crown fitting, once osseointegration and tissue healing are complete
This structure lets you return home between visits while your implant integrates, then come back for the final restoration.
Frequently Asked Questions
How long does it take for an implant abutment to heal?
Gum tissue around a healing abutment typically stabilizes in 2-6 weeks. This follows the earlier osseointegration phase, which takes 3-6 months on its own.
Can you eat normally with a healing abutment?
Not immediately. Soft foods are recommended at first, avoiding direct biting pressure on the implant site. Normal eating resumes gradually as your gums adjust.
What is the difference between a healing abutment and an implant abutment?
A healing abutment is temporary and shapes gum tissue during recovery. A permanent abutment is the lasting connector between your implant and the final crown.
Is placing a healing abutment painful?
The procedure is performed under local anesthesia, so discomfort during placement is minimal. Mild soreness afterward is normal and manageable with over-the-counter pain relief.
What should I do if my healing abutment feels loose?
Contact your dental provider right away. A loose abutment can compromise tissue healing and increase infection risk if left unaddressed.
Are healing abutments used in every implant case?
Not always. Your dentist may use a one-stage approach (healing abutment placed immediately) or a two-stage approach (cover screw first). Bone grafting needs and other clinical factors guide that choice.